
How to add a patient to Penciled
Patients can be added to Penciled manually or automatically.
Most clinics start by adding patients manually to get familiar with the platform, then transition to automatic imports once their setup is complete.
Add patient from Penciled platform
You can manually add a patient directly inside Penciled — ideal when first getting started or testing the workflow.
- Click patients in the sidebar.
- Click the + button next to the Patients title to open the add patient form.

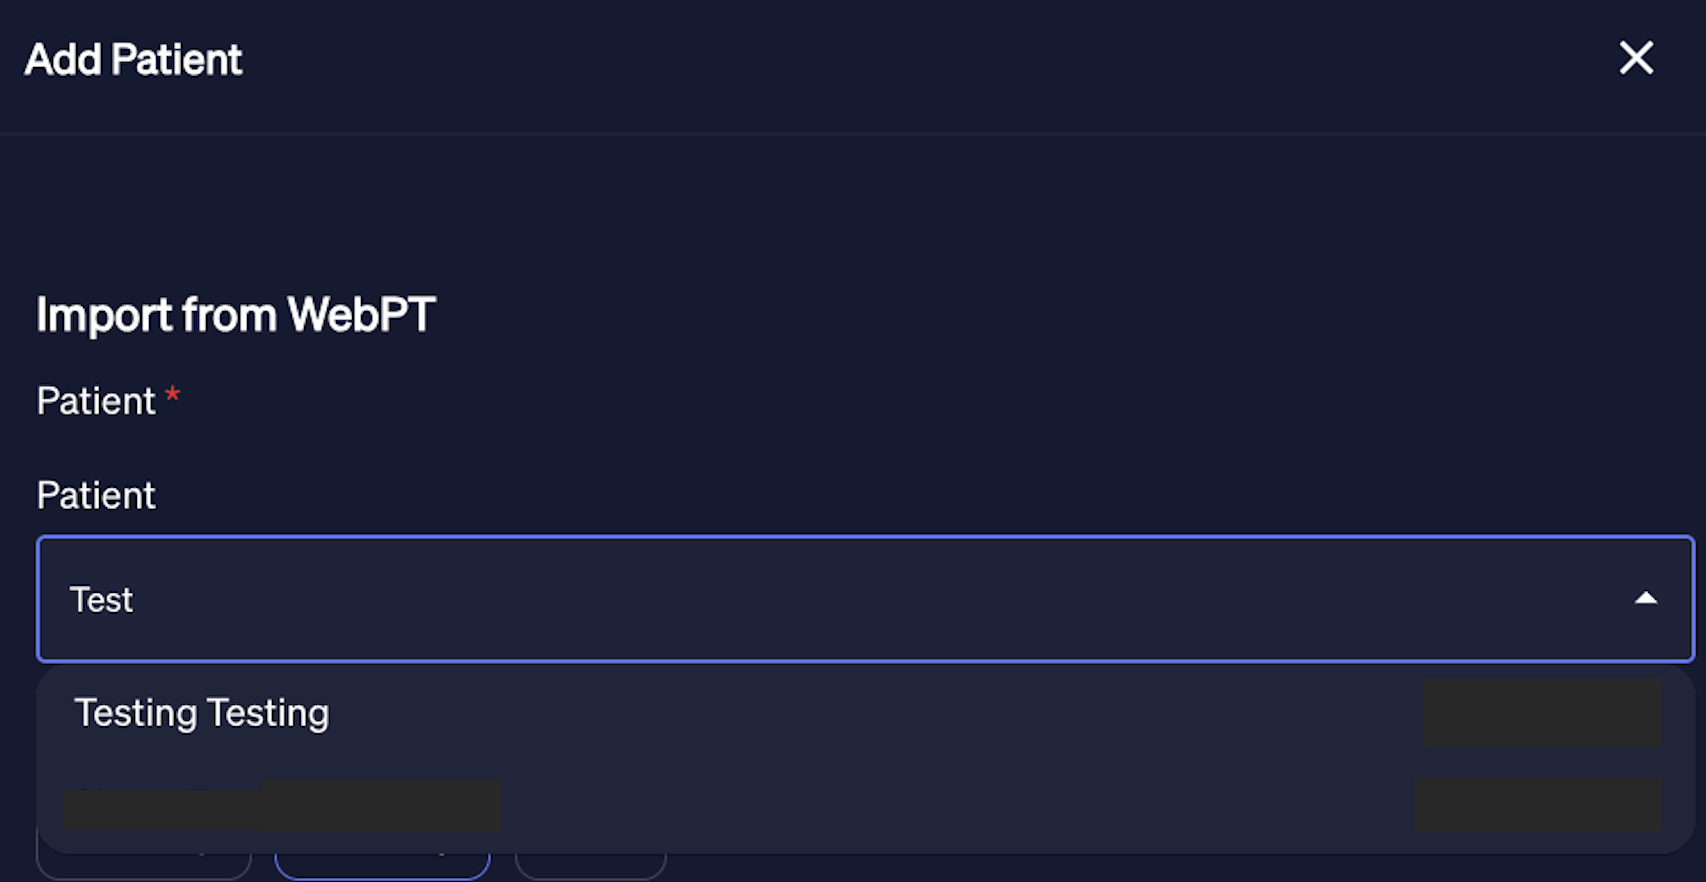
Importing a WebPT patient
The add patient form will prompt you to import the patient directly from WebPT.
Once you type at least the first three letters of the patient’s name, Penciled automatically searches WebPT in real time.
Search results include the patient’s first name, last name, and EMR ID, with no delay.
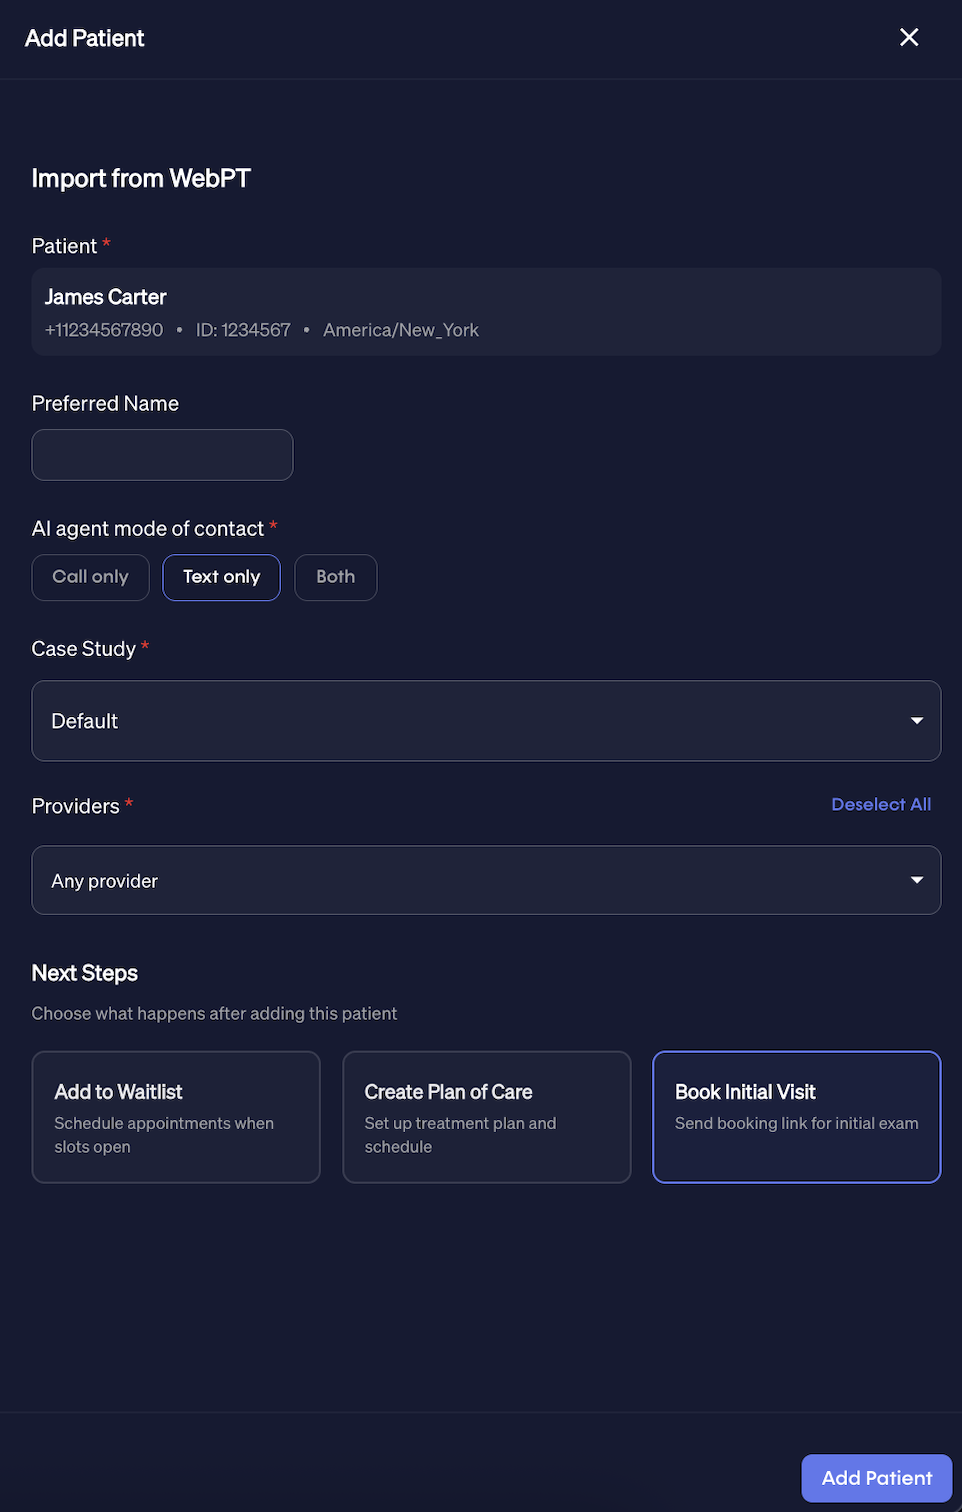
After selecting a patient, Penciled will automatically load their most recent active case study.
You can then immediately add them by clicking add patient at the bottom right.
Note:
The preferred name field in Penciled overrides the equivalent field in WebPT.
Some clinics use WebPT’s preferred name field for scheduling or authorization notes, so Penciled provides its own version to prevent confusion.
You can enable the setting ignore patient nickname field in WebPT if you want Penciled’s AI to always use the Penciled preferred name instead.
Next steps for patient
When adding a patient, you can choose what should happen next:
- Add to waitlist
- Create plan of care
- Book initial visit
Add to waitlist
Add the patient to the waitlist immediately as part of the same workflow.
Click add to waitlist to reveal the waitlist inputs.
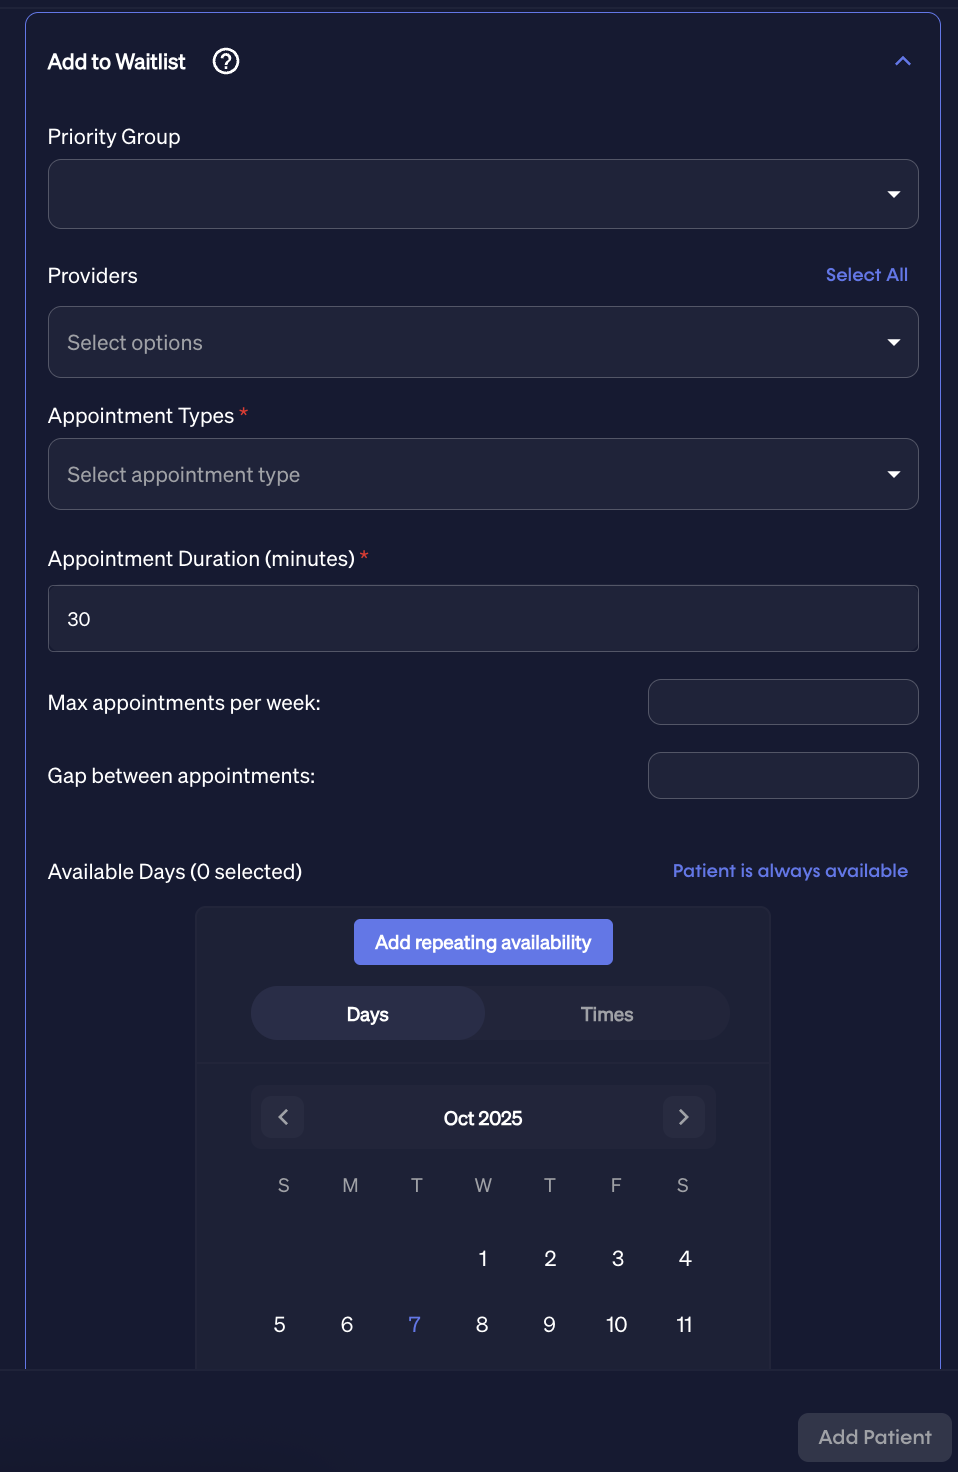
See enrolling patients onto the waitlist for a refresher on these fields.
Create plan of care
For patients who already have a visit scheduled, you can create a plan of care to schedule remaining follow-ups.
Click create plan of care to open the form after adding the patient.
See create plan of care for details on these inputs.
Book initial visit
For new patients who need their initial exam scheduled, select book initial visit.
Penciled will automatically send the patient a secure scheduling link after the patient is added.
See scheduling initial exams for more details.
Automatically adding patients
Once your clinic’s workflow is established, Penciled can automatically detect active patients who are missing visits.
These patients are automatically added to Penciled, their plans of care are loaded from WebPT, and the AI begins messaging them to schedule remaining visits — all without front office supervision.
See auto add to learn how to configure this automation.